You've bought a power meter and now want to seamlessly integrate it into your Home Assistant? Great idea! In this article, I'll show you step-by-step how to do it with ease. You can find the video tutorial at the end of the article or directly on YouTube.
Before you begin, please ensure that your energy meter (Tasmota device) is already connected to the internet. You will need the local IP address of both the energy meter and your Home Assistant system. If you don't know your Home Assistant's local IP address, simply install the handy " Local IP " extension from the Home Assistant Store – this will help you find it quickly.
Step 1: Install MQTT Broker
In order for your electricity meter to communicate with Home Assistant, you need a Mosquitto MQTT Broker .
- Open your Home Assistant
- Go to Settings → Add-ons
- search for Mosquitto Broker and install it
- Activate the options "Starting when boating" and then click on "Start"

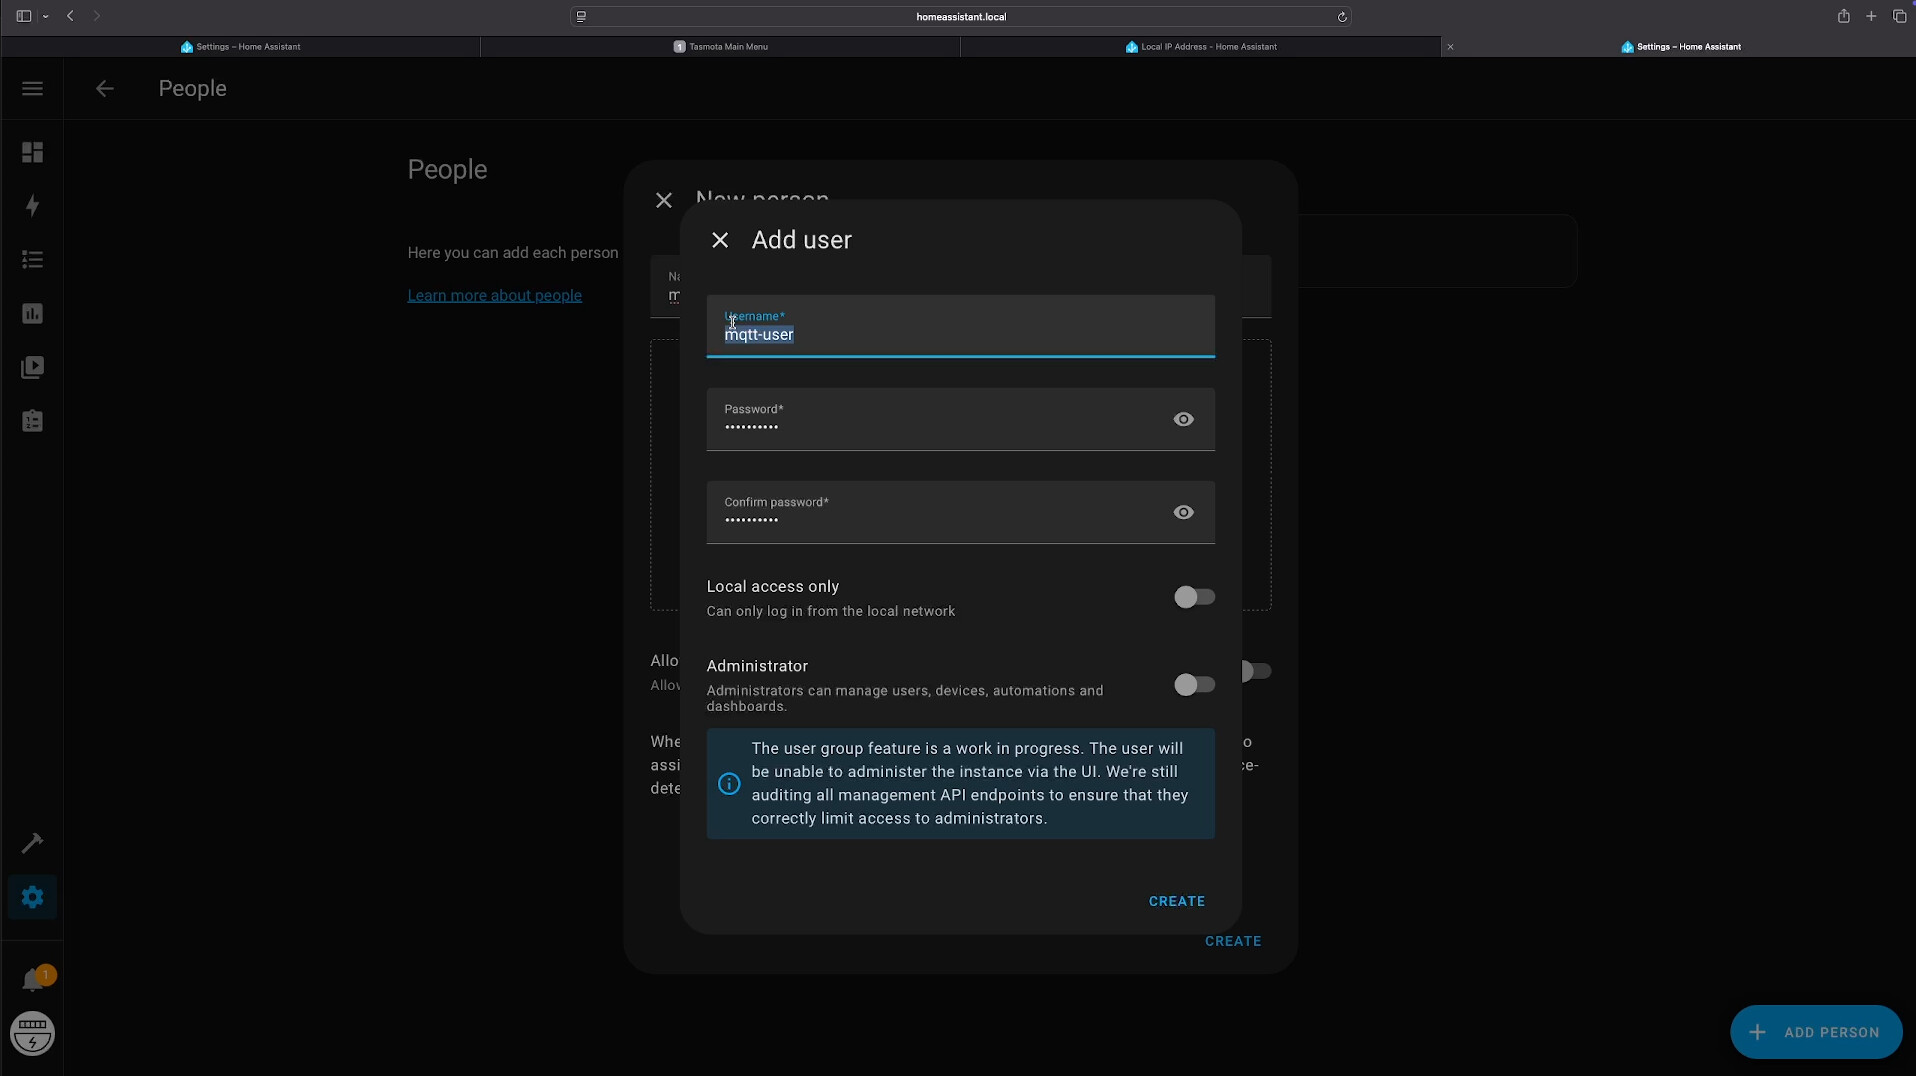
Step 2: Create a user for MQTT
Now create a user that your power reader can use to access MQTT:
- Go to Settings → People → Add person
- Name:
mqtt-user - Password: Choose a secure password
- Click on Create
Step 3: Restart Home Assistant
To ensure everything is applied correctly, restart your Home Assistant:
- Settings → System → Hardware → Restart
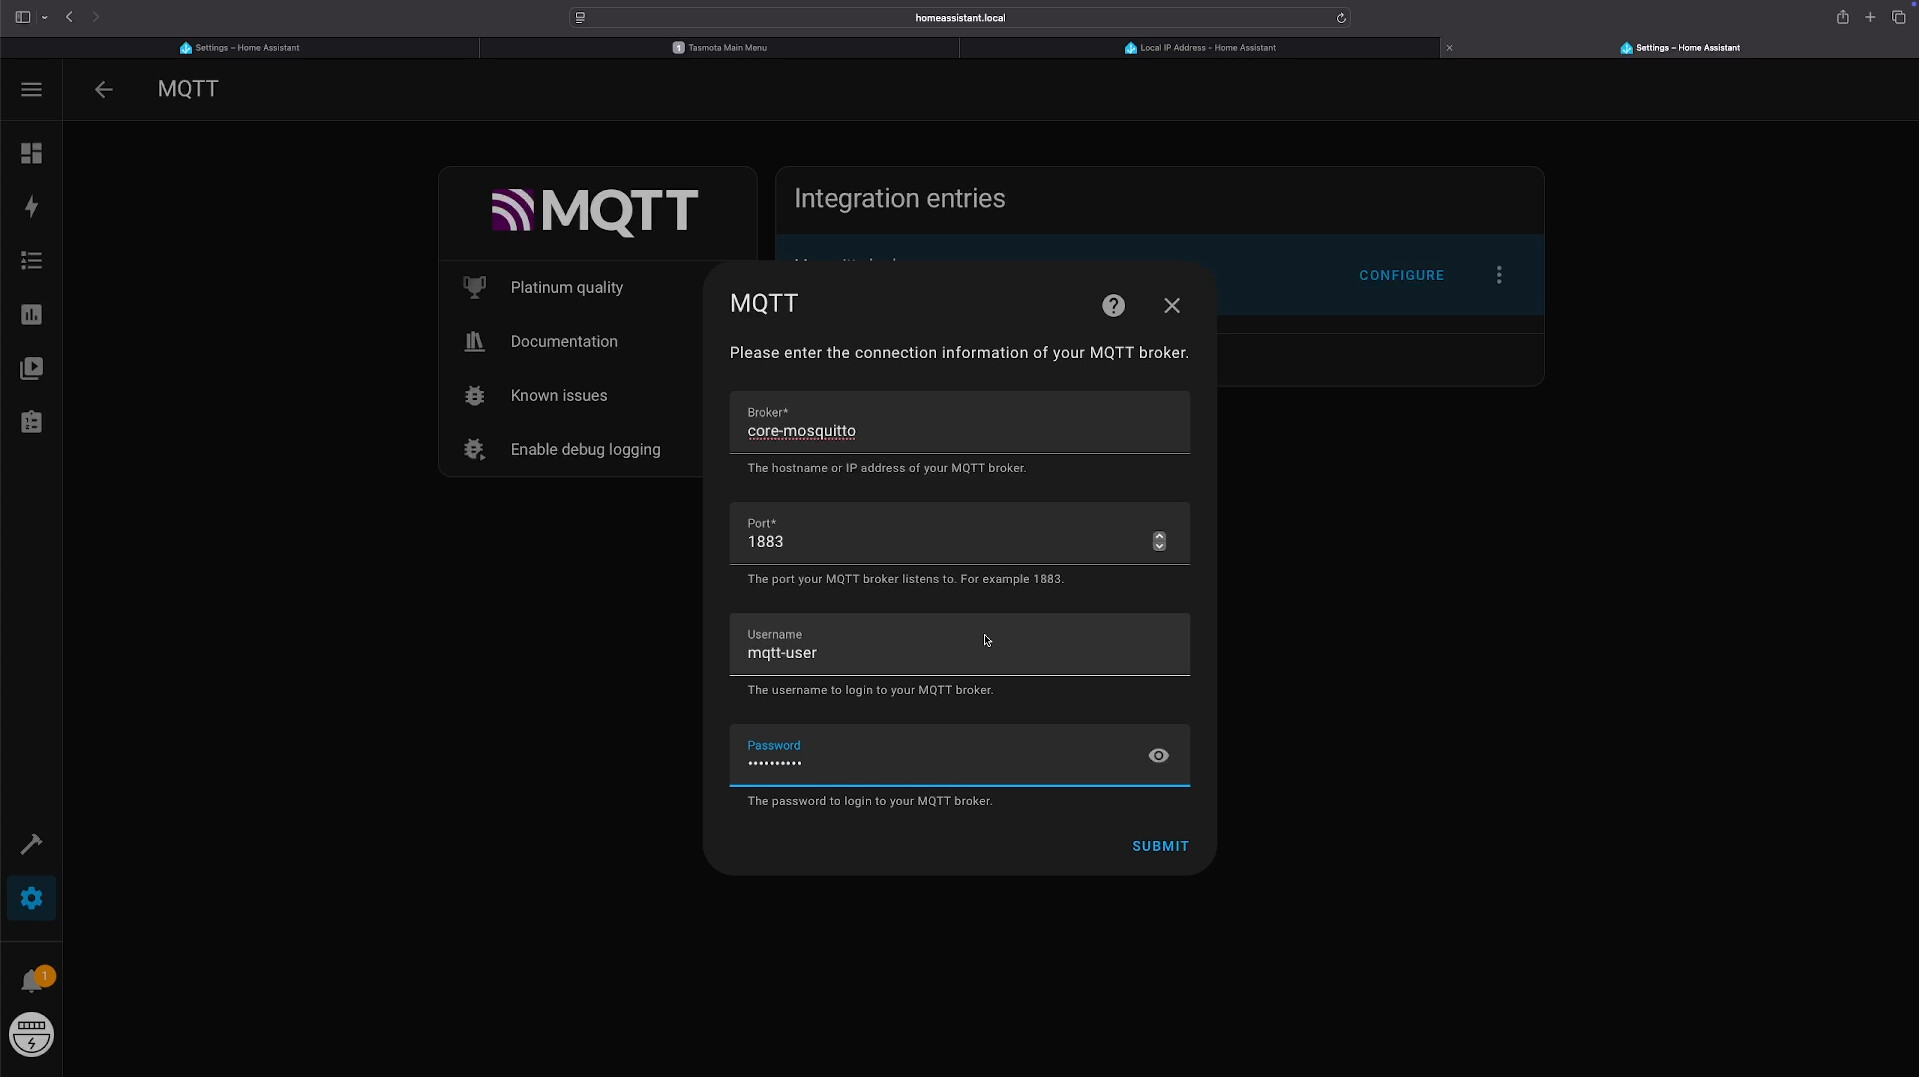
Step 4: Setting up MQTT integration
Now we ensure that MQTT is configured correctly:
- Settings → Devices & Services → Add integration
- search for MQTT , click on it and select reconfigure
- Enter the following data:
-
Broker:
core-mosquitto -
Port:
1883 -
User name:
mqtt-user -
Password: the password you set
Then you click on memory
-
Broker:
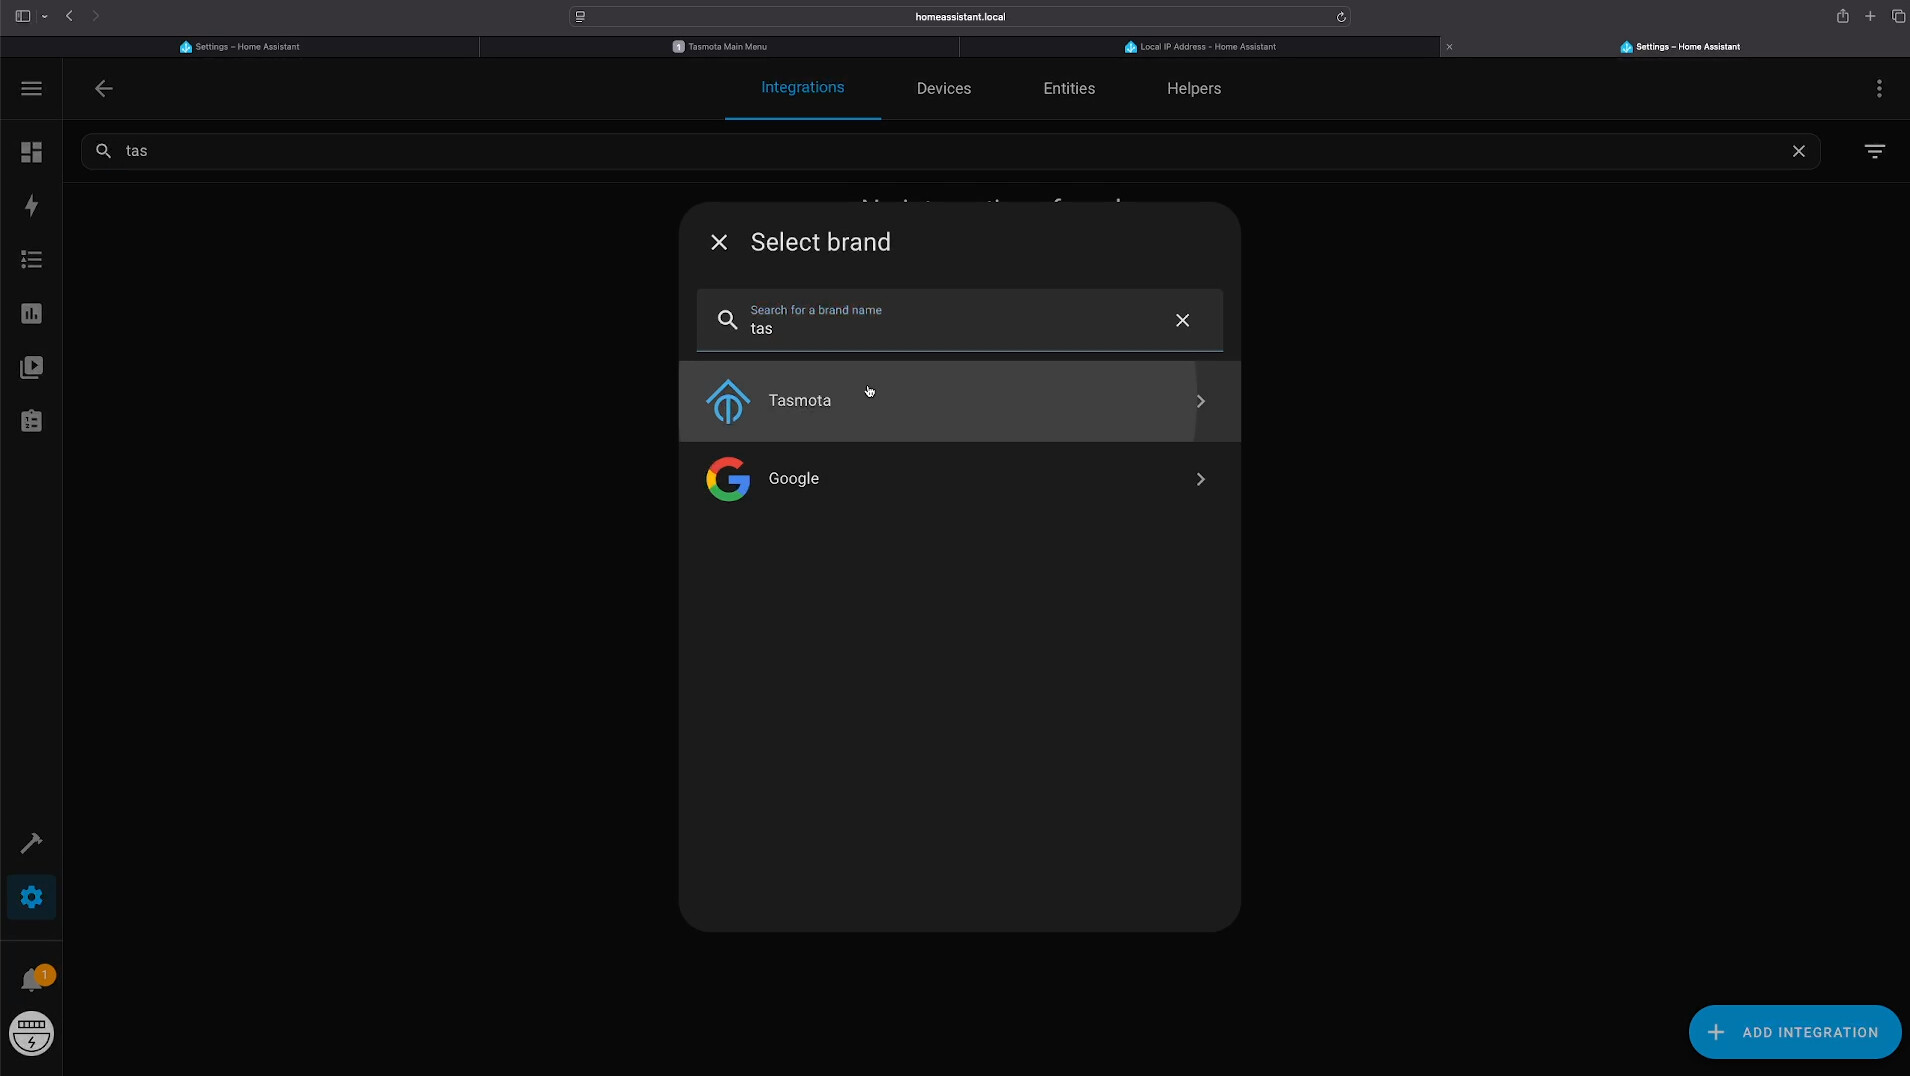
Step 5: Add Tasmota integration
Now you can easily integrate Tasmota:
- Go to Settings → Devices & Services → Add integration
- search for Tasmota and add it
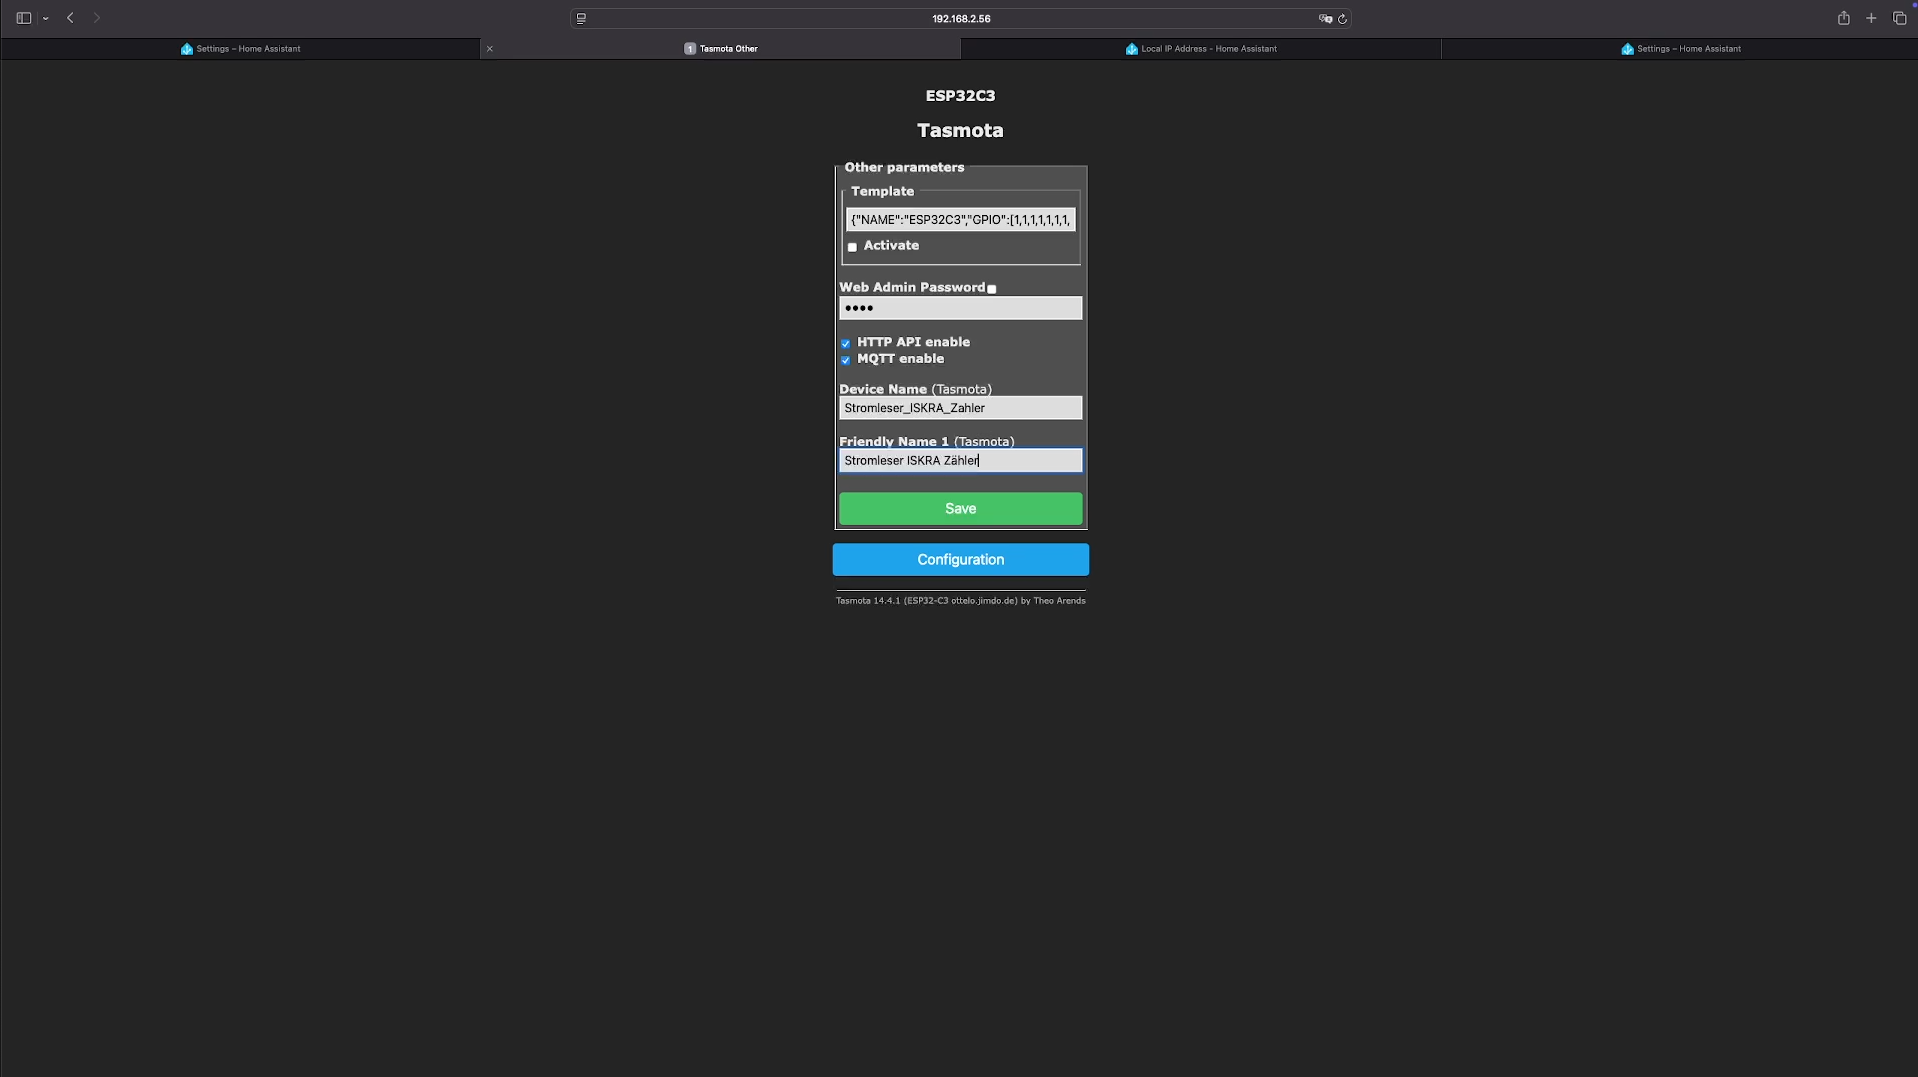
Step 6: Configure the Tasmota power meter
Now we'll switch to the interface of your electricity meter (use its local IP address):
- Open the Tasmota web interface (
http://<stromleser-ip>) - Click on Configuration → Configure Other
- Give them suitable names, e.g.:
-
Device Name:
Stromleser_home -
Friendly Name:
Stromleser Home
-
Device Name:
- Be sure to activate Enable MQTT (Check the box!)
- Confirm with Save
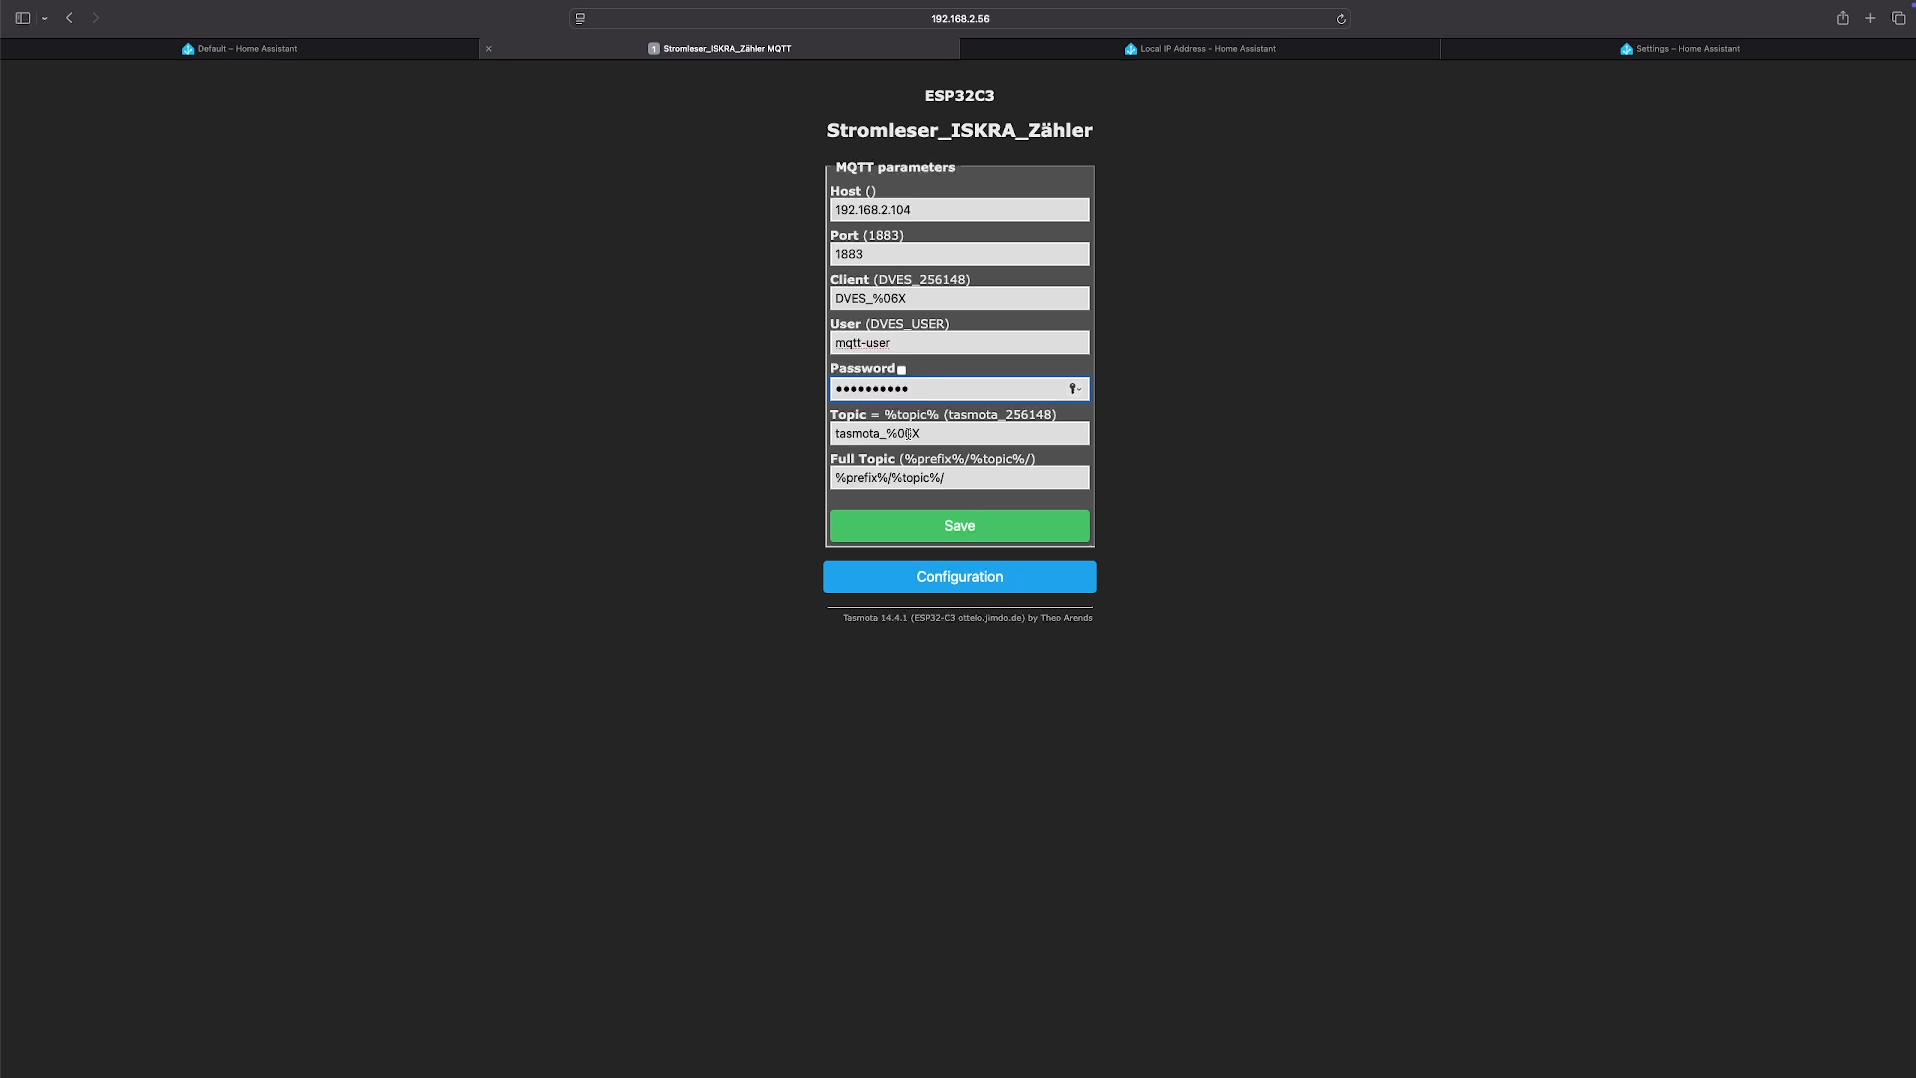
Step 7: Configure MQTT in Tasmota
Now you connect your electricity meter to your MQTT broker in Home Assistant:
- Go back to Configuration → Configure MQTT
- Enter the following:
- Host: Local IP address of Home Assistant (which you found through the plugin)
-
User name:
mqtt-user - Password: your chosen password
- Confirm again with Save
Success! Your electricity meter is now connected to Home Assistant.
You can now find it clearly arranged at Settings → Devices & Services → Tasmota .
Frequently asked questions and quick solutions:
Here are a few quick tips in case something doesn't work right away:
Home Assistant doesn't automatically recognize your device?
Go to Tasmota Tools → Console and enter:
SetOption19 0
Your device should then be recognized.
Data transfer too slow/fast?
Adjust the data transfer interval in the Tasmota console. For example, every 60 seconds:
-
TelePeriod 60
Here you can watch our step-by-step video instructions.
❗️ If you have any questions or need support, please contact us by email ( info@energieleser.de ).


Leave a comment
This site is protected by hCaptcha and the hCaptcha Privacy Policy and Terms of Service apply.